SAP AIF – How to create Interface Variants

Introduction
During my projects, I often experience the situation when enterprise utilizes data exchange interfaces defined globally and they are expected to have the same logic for most of the situations. However, it can happen that the behavior of the interface needs to be slightly adjusted depending on some predefined parameters (like, for instance, company code).
Another example can be a situation where there is a need to slightly adjust a Standard SAP AIF Interfaces. Unfortunately, they can not be changed directly on a customer system.
In those cases, Interface Variants come to help us!
How to create AIF Interface Variants?
Imagine, that you need to modify a standard SAP interface for incoming Business Partners: BUPA_IN. If the category of partner (PARTNERCATEGORY) is “Organization” then the fixed value “CORP” should be set into field PARTNERGROUP and a custom message should be added to the container.
This interface belongs to the namespace /AIF/, which was delivered by SAP That means that there is no possibility to change it directly and SAP AIF variants need to be used.
Step 1- Create a new variant
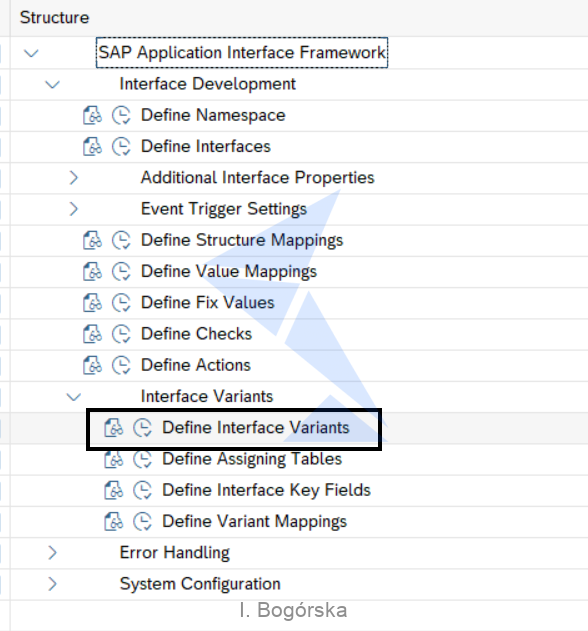
To create a new variant, go to transaction /AIF/CUST. Expand Interface Development->Interface Variants, then choose: Define Interface Variants:
As you can’t use /AIF/, provide your custom Namespace (we are going to use Namespace INT4):

Next, create a new entry and provide the variant’s name (e.g. ZBUPA_IN_PARTNERCAT ) and description:

Save your changes.
Step 2 – Variant Assigning Table
This type of table determines which variants should be assigned to an interface and which keyfields (parameters) should be used. Please take note that one assigning table could be used for multiple interfaces.
To create a new variant assigning table, you need to copy the template table /AIF/VAR_AS_TMPL. Then, you need to add all expected parameters as the new key-fields.In our example the additional keyfield is the category of partner (PARTNERCATEGORY):

As a result, I have created a table ZBUPAIN_VAR_TMPL with additional key-field PARTNERCATEGORY.
Next step is to fill this table with the expected data. I’m going to use the Table Maintenance View which I’ve created for this table. Here, create the new row and provide the information, including:
- Interface namespace, name and version
- Variant namespace, name
- Expected values of the parameter (PARTNERCATEGORY = Organization)[/list]

Now, when the configuration is done, save the row and assign this interface variant table to the variant.
Go back to the /AIF/CUST and choose Interface Development->Interface Variants then choose: Define Assigning Tables:

Next, choose the Namespace of the interface (here: /AIF/). You should see all interfaces belonging to this Namespace. Provide the name of the newly created Assigning Table and save:

Step 3 – Interface Key Fields
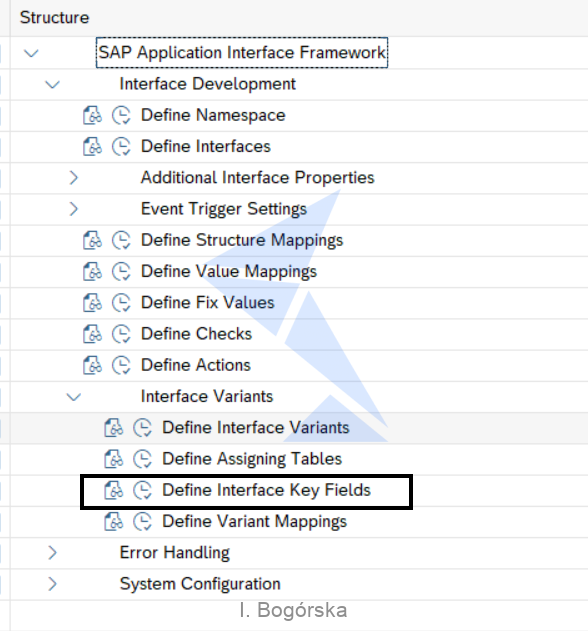
Go back to the Interface Development->Interface Variants then choose: Define Interface Key Fields:
Provide Namespace, Interface Name and version, then create a new row.
Use 10 as a Key Field Number, Choose PARTNERCATEGORY (you can use F4) as a Interface Variant Key Field. This value corresponds to the column name in the variant assigning table.
Next, provide Field Name, which should be the field in the raw structure to where our parameter will be mapped. You can use F4 here as well:

Save your changes. The customizing should now look like the following:

This setting ensures that, every time, if the value in the PARTNERCATEGORY matches values in the interface variant table ZBUPAIN_VAR_TMPL, then the configured Interface variant is selected to process the message.
Step 4 – Define Variant Mapping
In this step, we are going to map the newly created interface variant to the AIF interface.
Go to the Interface Development->Interface Variants then chose: Define Variant Mappings:

Then, select the Variant’s name (ZBUPA_IN_PARTNERCAT) and it’s Namespace (INT4).
In the next screen, press the button “New Entries” and provide information about the interface that should be assigned to the variant. The result should look like below:
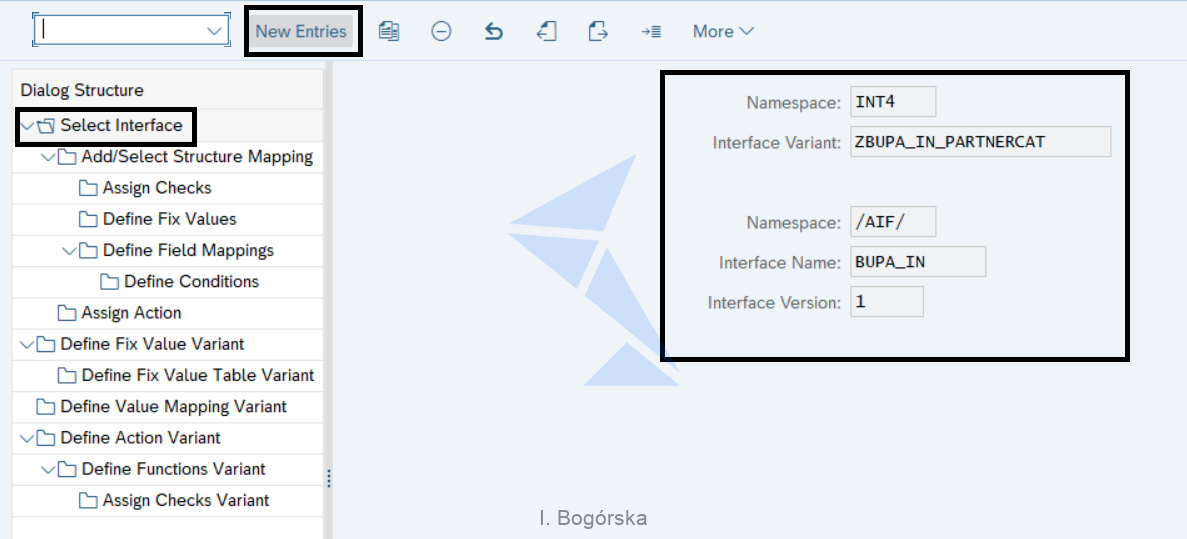
Interface is now mapped with the Variant.
Then click on Add/Select Structure Mapping and create a new entry, exactly the same way you would do with the structure mapping of an interface.
Use the same number of the mapping’s identifier (in our case “10” ) in order to associate your configuration with this specific mapping.
Then choose Assign Fix Values on the tree and add a new entry. Enter 10 as a Fix Value Number and then, choose CENTRALDATA-PARTNERTYPE as a field name, nd “CORP” as value.
Configuration should look like this:

Step 5 – Custom Action
To apply the additional logic to the AIF Interface we need to overwrite an existing action with the custom one.
To create a new action go to /AIF/CUST->Interface Development and select Define Actions:

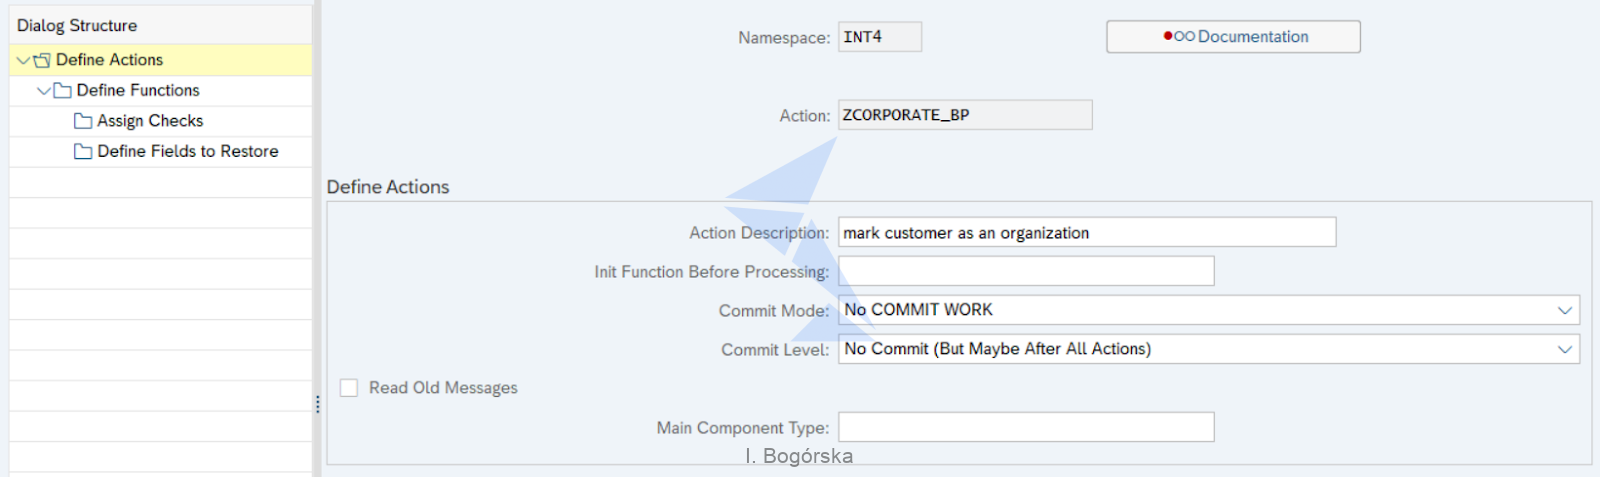
Enter your namespace (here INT4) and create a new entry. Provide the Action’s name, Description and decide when the COMMIT WORK should be performed.
For our case, your customizing should look like the following:
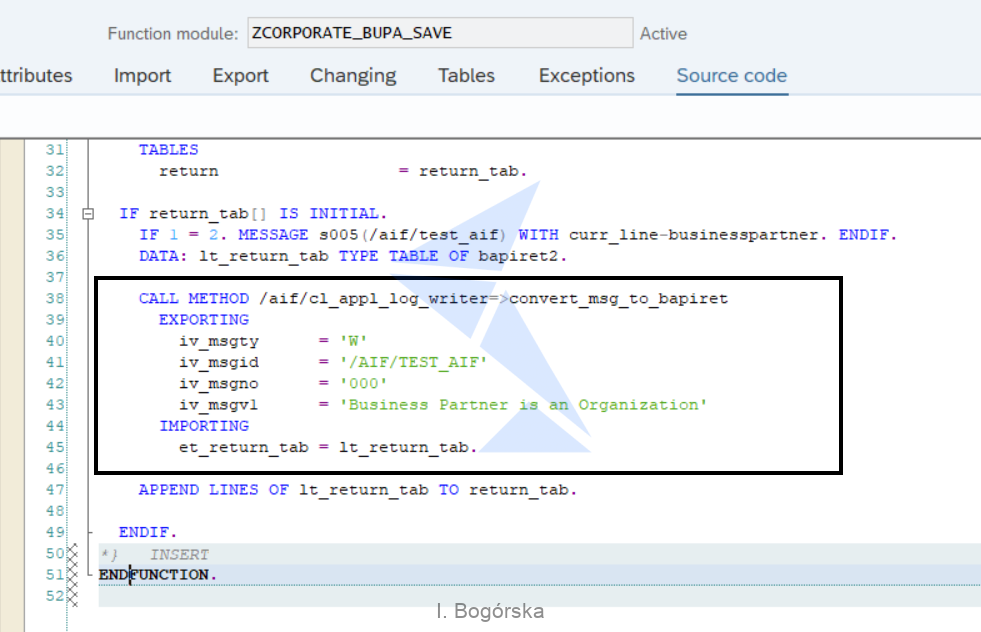
Next, click on the Define Functions on the left and create a new entry. Use 10 as the function number and enter the new function module name, in our case ZFM_AIF_BUPA_CORPORATE . You can use the forward navigation to create the function module which is already having the correct structure but needs to be filled with the correct logic.
In our example, I created the custom Function Module ZCORPORATE_BUPA_SAVE copying and modifying the already pre-configured FM /AIF/TEST_AC_BUPA_SAVE. This module is used in a standard action BUPA_SAVE, which I’m going to replace.
I made a small modification to replace the Success message that the BP was created to the Custom Warning with an information that the “Business Partner is an Organization”. I don’t have to put into the logic the check if the PARTNERCATEGORY = “Organization” because this validation is done on the Variant level:
When the Function Module is ready, it needs to be assigned to the Action.
Come back to the Configuration of the Action ZCORPORATE_BP, Choose “Define Functions”, then Add new row. Use 10 as a Function Number and ZCORPORATE_BUPA_SAVE as a FM name. Configuration should look like on the following screen:

Now, we have to assign an action to the interface variant.
You should come back to the place we were at the end of Step 4. (Interface Development->Interface Variants->Define Variant Mappings ) and choose our custom Variant.
Press “Assign Action” from tree on the left, and then “New Entries”:

Use 10 as a number of action and as well provide Namespace, name and version of interface
Together with Namespace and the name of the custom variant:

Now, your action is assigned to the interface BUPA_IN, which ends the configuration of the AIF Variant.
Summary
Congratulations! Right now you can create AIF Variants!
Want to learn more about SAP AIF? Check other articles about SAP AIF on Int4 blog.
Read also:
1. Set up interface in SAP AIF Interface Monitor (/aif/ifmon)
2. Interface monitoring in business process context with SAP AIF and Process Observer
Popular tags
ABAP int4 INT4 IFTT Int4Interview S/4HANA SAP AIF SAP CPI sap integration